Exams
Create exams and see which classes sit them.
An exam is one assessment period, such as First Terminal Assessment 2083. It has a name, start and end dates, an optional number of school days (used on report cards) and a marks deadline. Exams belong to the current school and batch (academic year).
Creating the exam is only the first step. You then add classes to it in Exam Classes and set the marks in Subject Marks Setup.
Before you start
- Create at least one shift of type Exam (Main Entry → Shift). Exam-shift dropdowns list only these.
- Make sure the classes and their subjects exist, and that the current batch is the right one.
The list page
Open Exam Section → Exams.
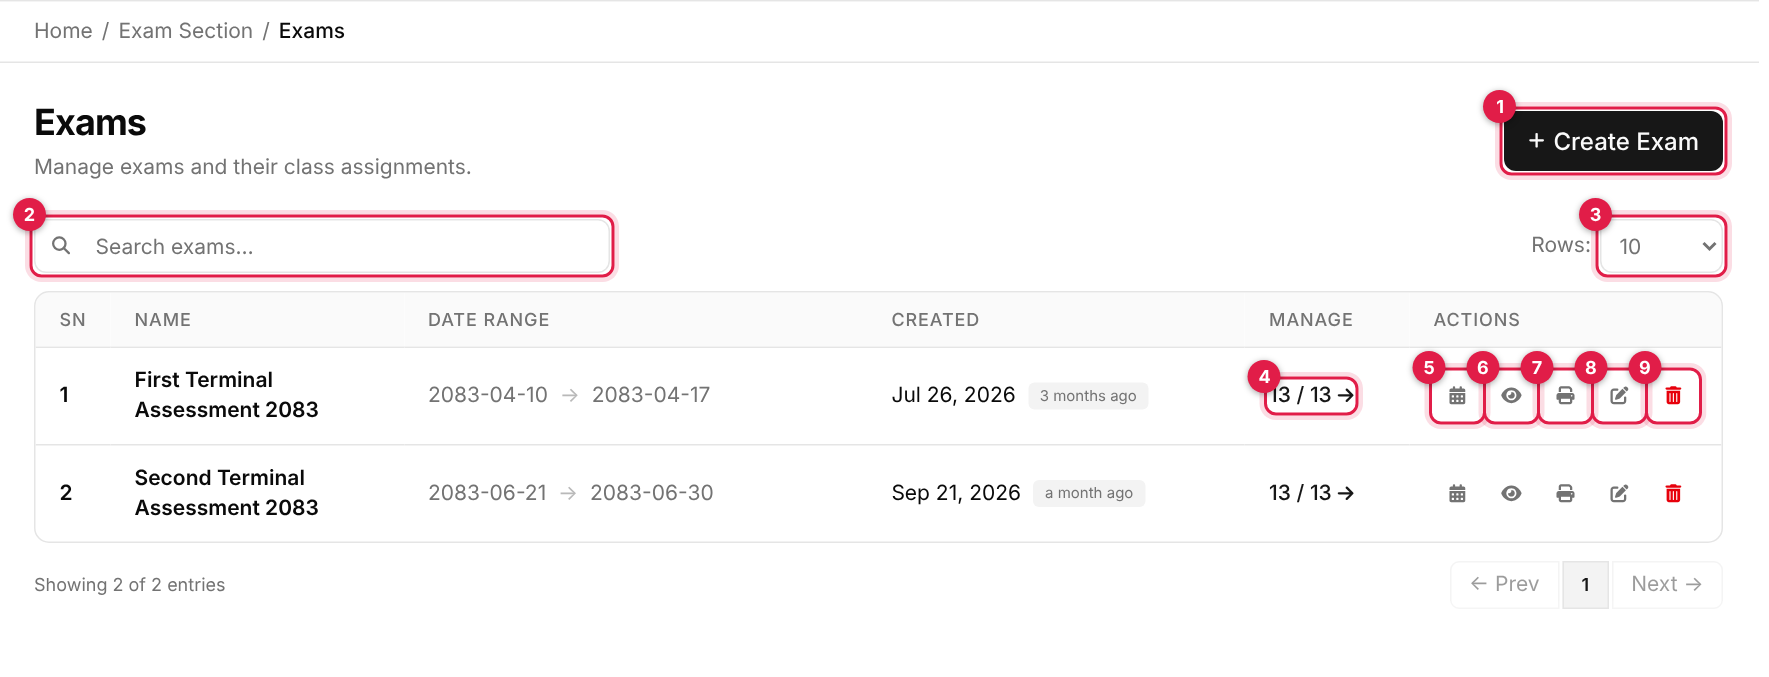
- 1Create Exam opens the create form (a full page).
- 2Search exams by name as you type.
- 3Rows: 10, 20, 50 or 100 per page.
- 4Manage: assigned classes / active classes, for example 13 / 13. Click it to open Exam Classes. It is red when no class is assigned yet.
- 5Exam Routine (calendar icon): a printable exam timetable, opens in a new tab.
- 6View (eye): the exam detail page.
- 7Symbol No Print (printer): printable symbol numbers for the whole exam, opens in a new tab.
- 8Edit (pencil).
- 9Delete (red bin).
Create an exam
-
1
Open the form
Click Create Exam (callout 1). -
2
Fill in the exam details
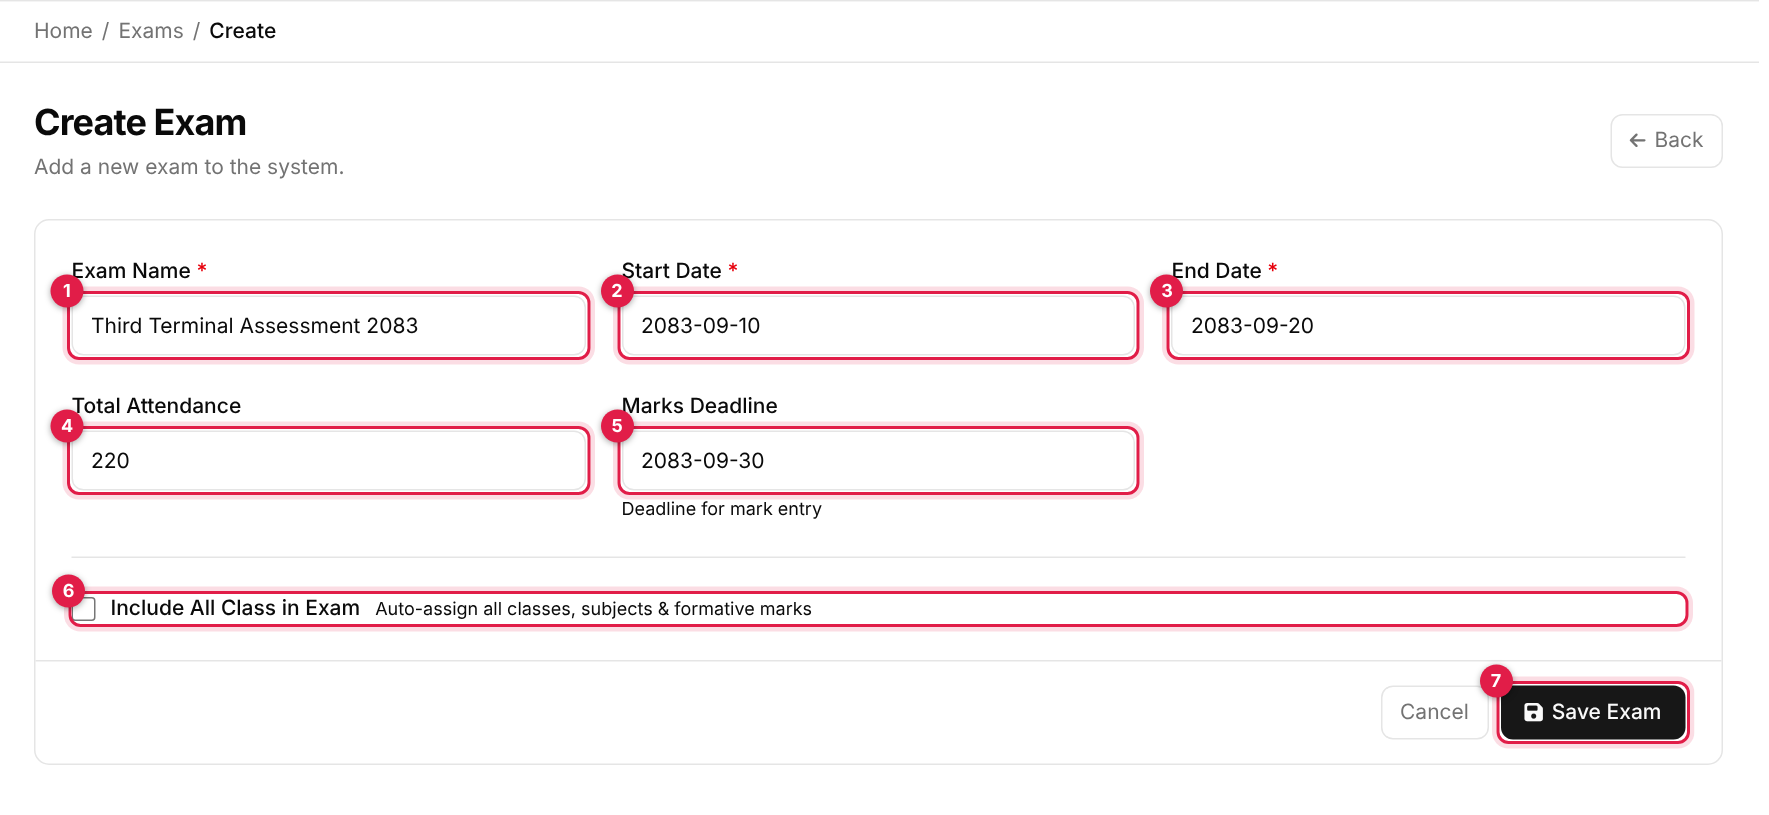
The Create Exam form # Field Required What to enter 1 Exam Name Yes A clear, unique name, for example Third Terminal Assessment 2083. The same name cannot be used twice in one batch.2 Start Date Yes First day of the exam, Nepali date YYYY-MM-DD. It defaults to today.3 End Date Yes Last day of the exam. The system does not check that it is after the start date. 4 Total Attendance No Total school days in the term. It is printed on report cards as attendance / total. 5 Marks Deadline No The last day marks may be entered. After this date mark entry is locked. See the tip below. 6 Include All Class in Exam No Tick to set up every class in one go (see the next step). Leave it off to add classes one by one later. Callout 7 is the Save Exam button.
-
3
Optional: set up all classes at once
Ticking Include All Class in Exam reveals a bulk-setup area.
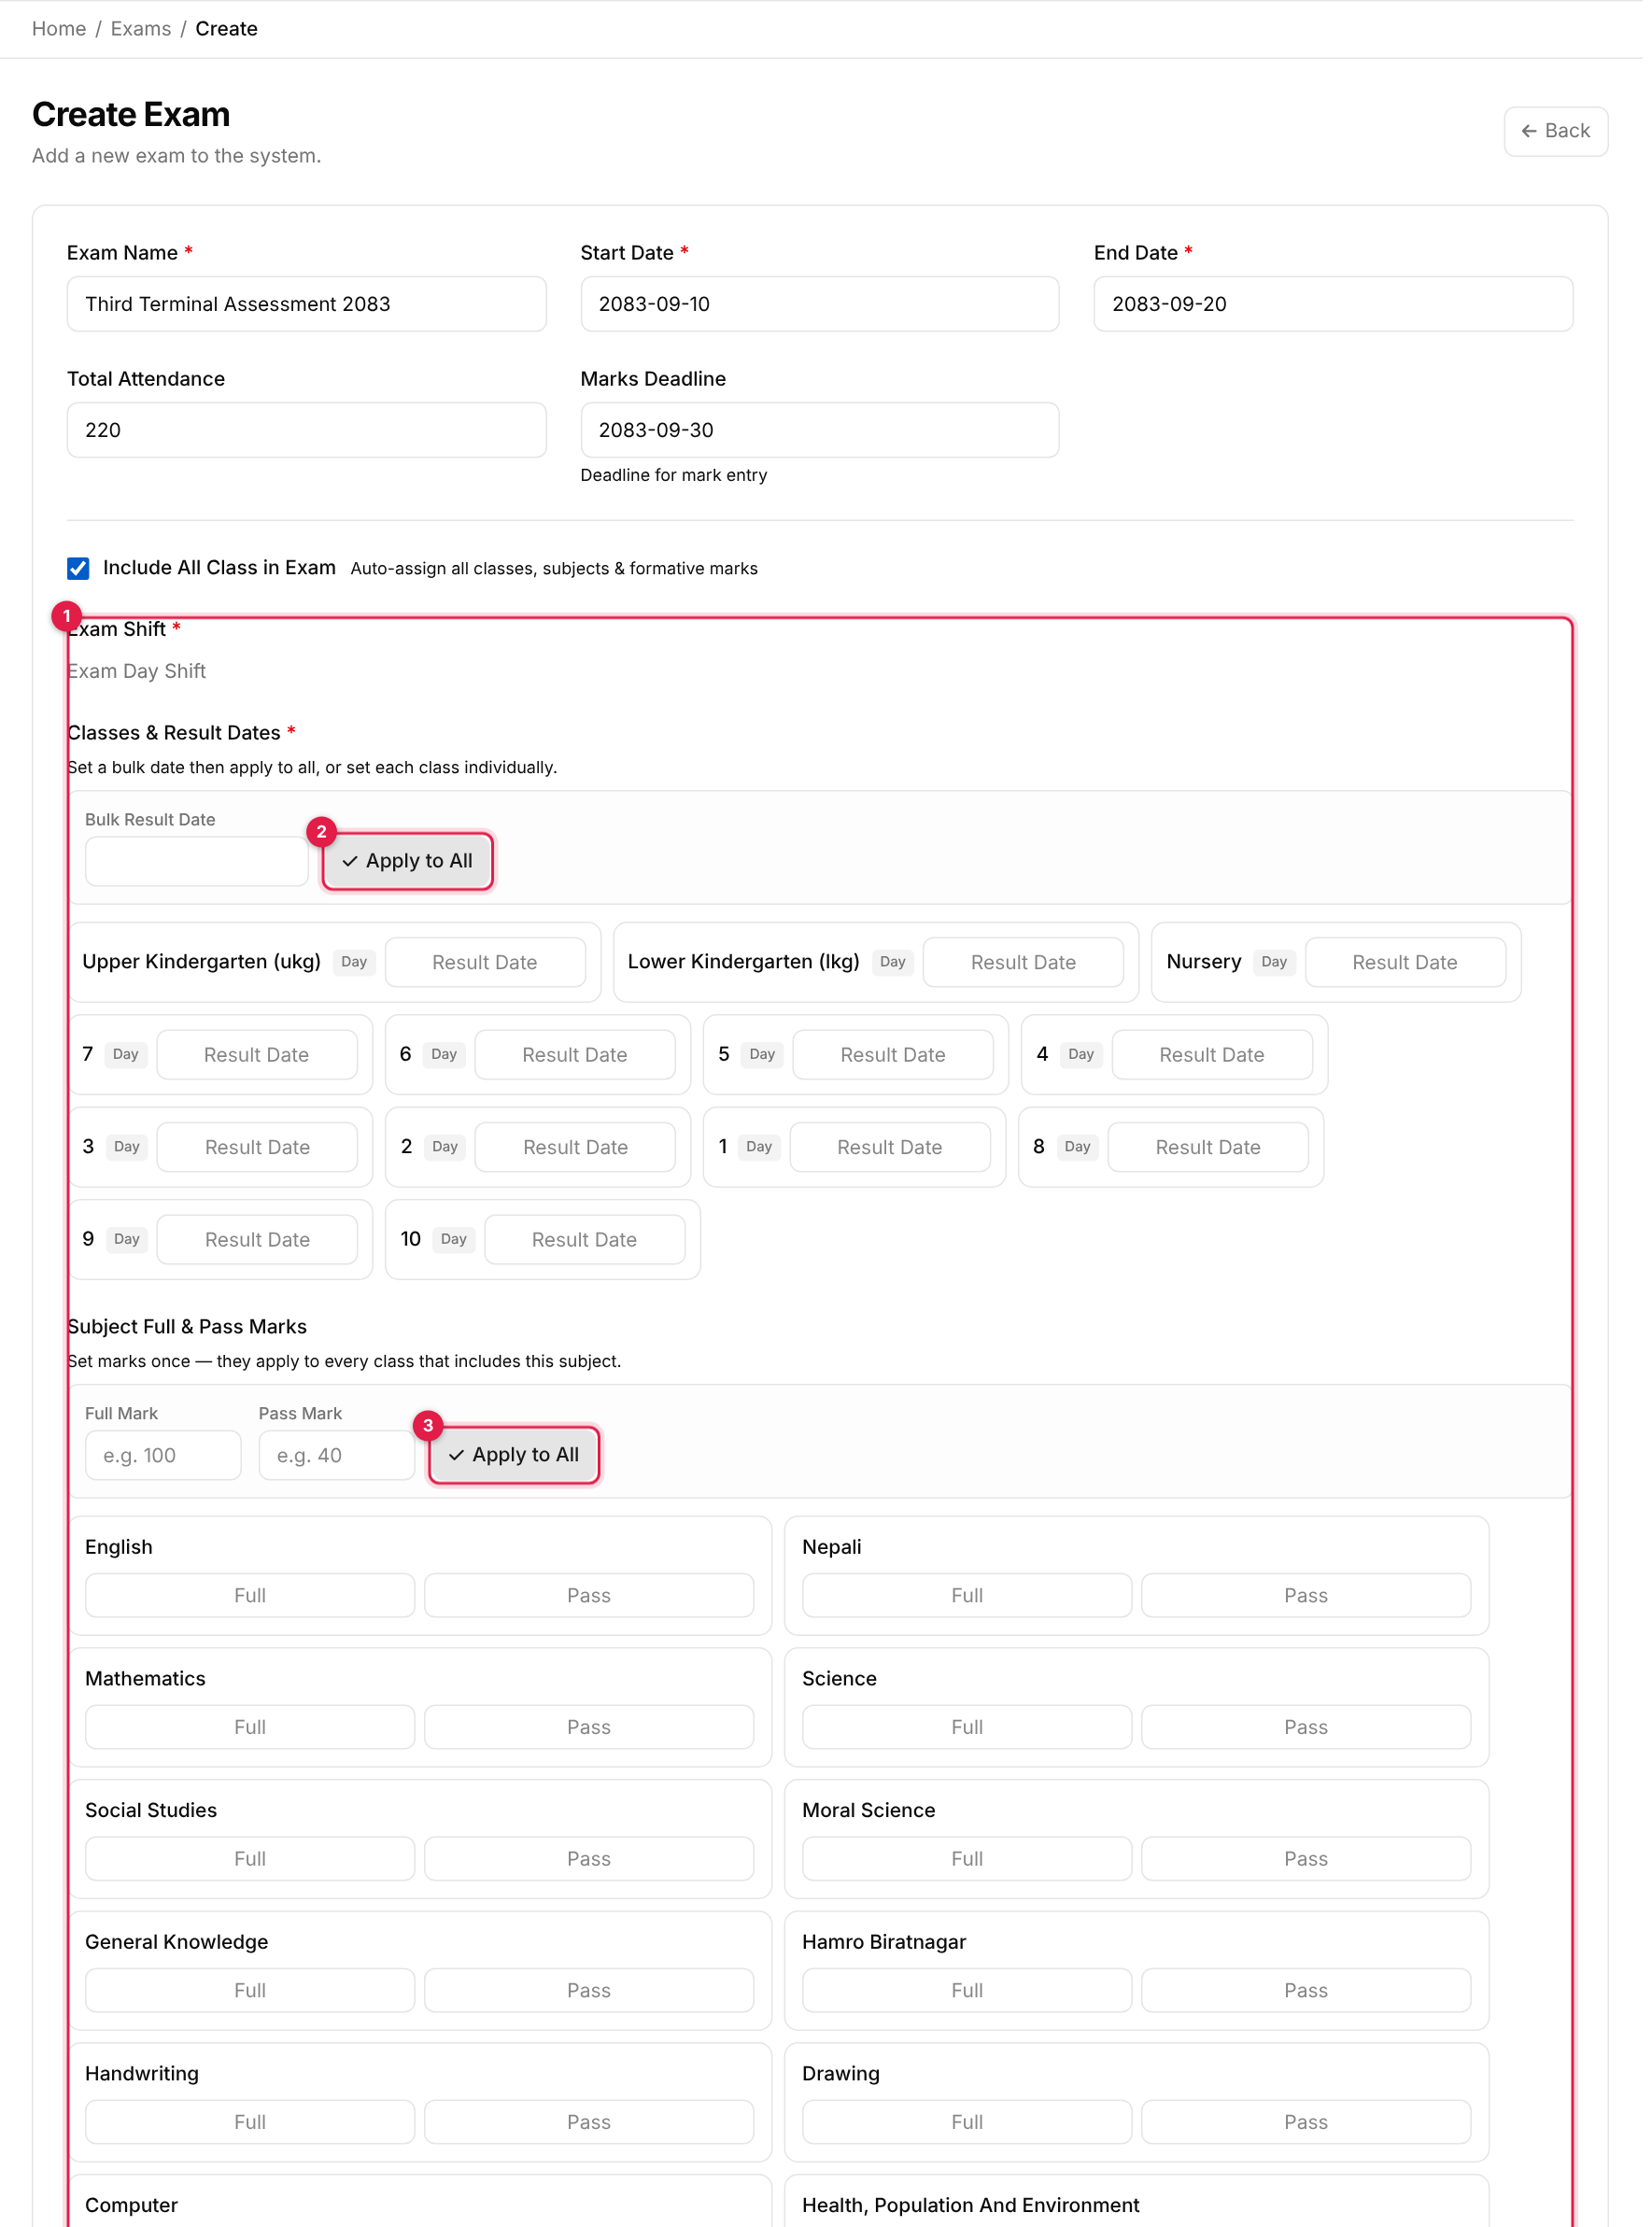
Include All Class in Exam, expanded - Exam Shift (callout 1): which exam shift every class uses. If there is only one it is chosen for you.
- Classes & Result Dates: type a Bulk Result Date and click Apply to All (callout 2), or set each class's date separately.
- Subject Full & Pass Marks: type one Full and Pass mark and click Apply to All (callout 3), or set them subject by subject. A subject left blank gets no marks row and shows Marks not entered later.
- A Formative Assessment section below lets you set full and pass marks for each formative assessment type.
This creates every active class, its subjects and its formative marks in one save. Exam dates and rooms are not set here; set exam dates in Subject Marks Setup.
-
4
Save
Click Save Exam. A Saving exam… message appears, then Exam created successfully! and you return to the list.
Set a realistic Marks Deadline
View an exam
Click the eye icon (callout 6).
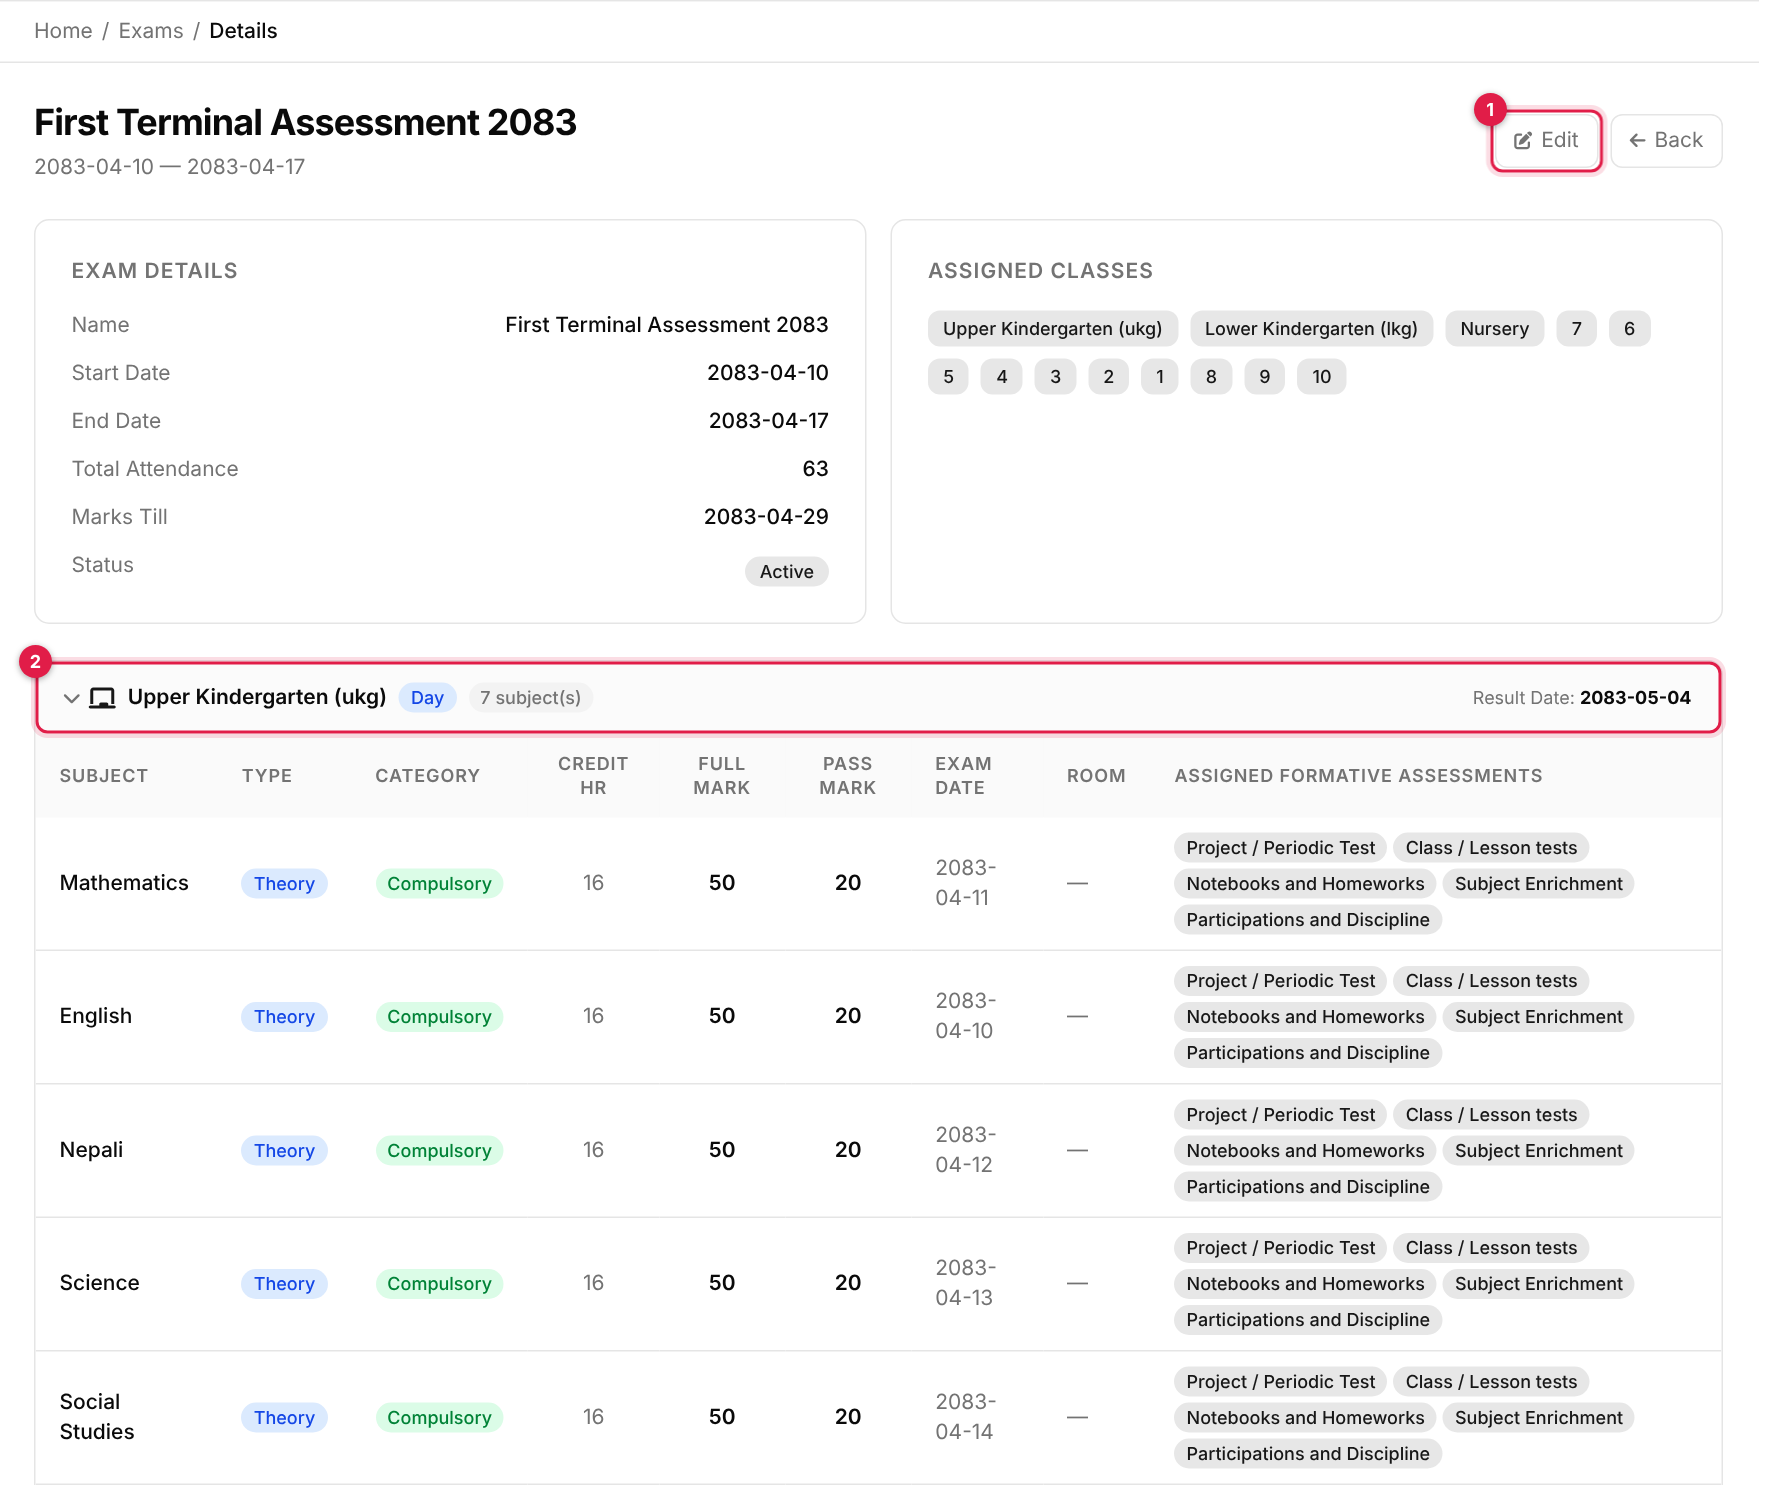
- 1Edit the exam.
- 2One row per assigned class and shift, showing the shift, the number of subjects and the result date. Click a row to open it.
The top of the page lists the exam's name, dates, total attendance, marks deadline and status, and the assigned classes. An opened class shows each subject's type, category, credit hours, full and pass marks, exam date and room, and the formative assessments assigned to it. A subject with no marks yet shows Marks not entered.
Exam routine
Click the calendar icon (callout 5) to open the timetable in a new tab.
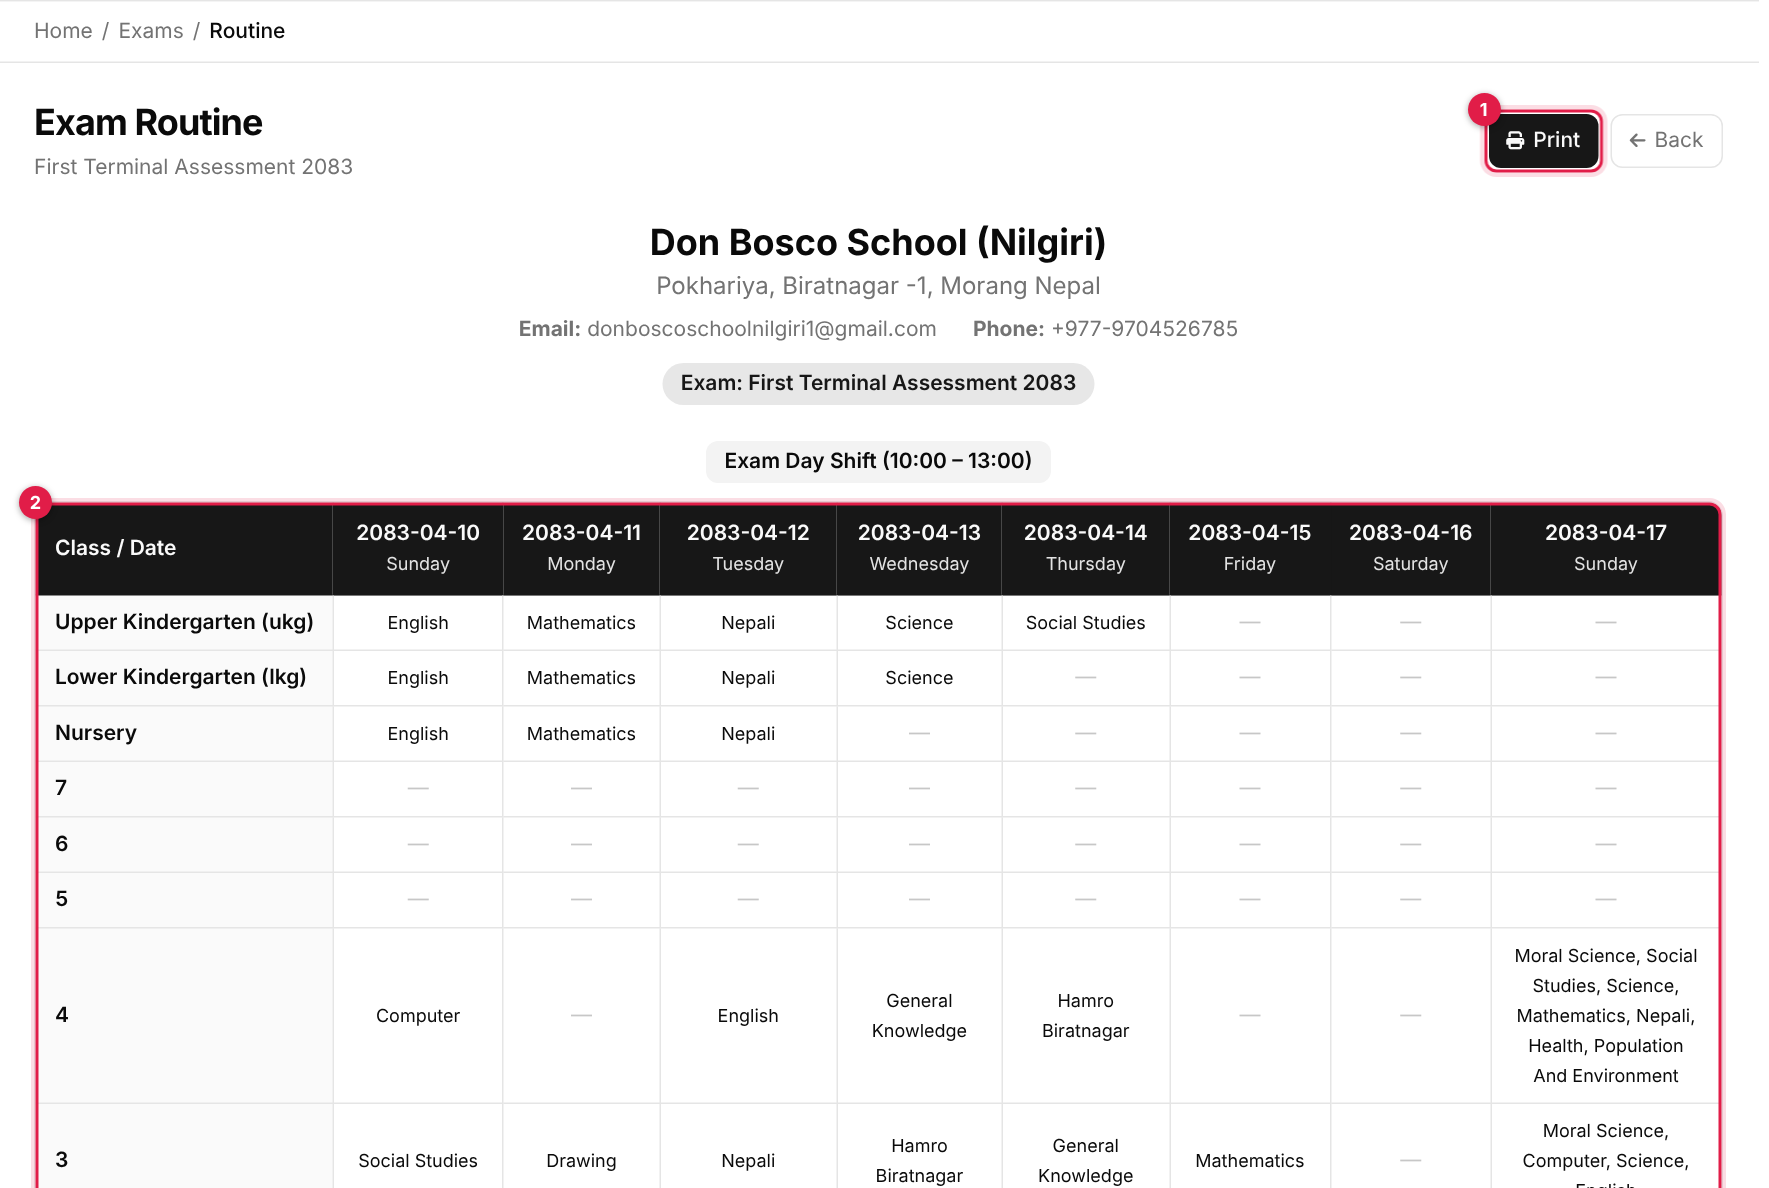
There is one table per exam shift. Rows are classes, columns are the dates from the exam's start to its end, and each cell shows the subjects whose Exam Date falls on that day. Print sends it to the printer. The routine stays empty until exam dates are entered in Subject Marks Setup.
Edit an exam
-
1
Open it
Click the pencil (callout 8). -
2
Change and update
You can change the name, dates, total attendance and marks deadline. Click Update Exam (Data updated successfully!). The edit form does not add or remove classes; use Exam Classes for that.
Total Attendance and Marks Till are required when editing
Delete an exam
Click the red bin (callout 9) and confirm Are you sure?. The exam, its classes and their marks setup are removed.
Deleting is permanent
Messages you may see
| Message | What it means |
|---|---|
| Exam created successfully! | The exam was added. |
| Data updated successfully! | Your changes were saved (also Data could not be updated! if refused). |
| Record deleted successfully. | The exam was removed. |
| Please fix the highlighted fields. | A required field is empty, or the exam name already exists in this batch. |