Exam Classes
Choose which classes sit an exam and manage each one.
This page links classes to an exam. For each class you choose its class shift, the exam shift it sits in and its result date. From the same page you reach every per-class task: marks setup, formative marks, symbol numbers, admit cards and the class routine.
Open the page
In Exams, click the Manage value (such as 13 / 13) on the exam's row.
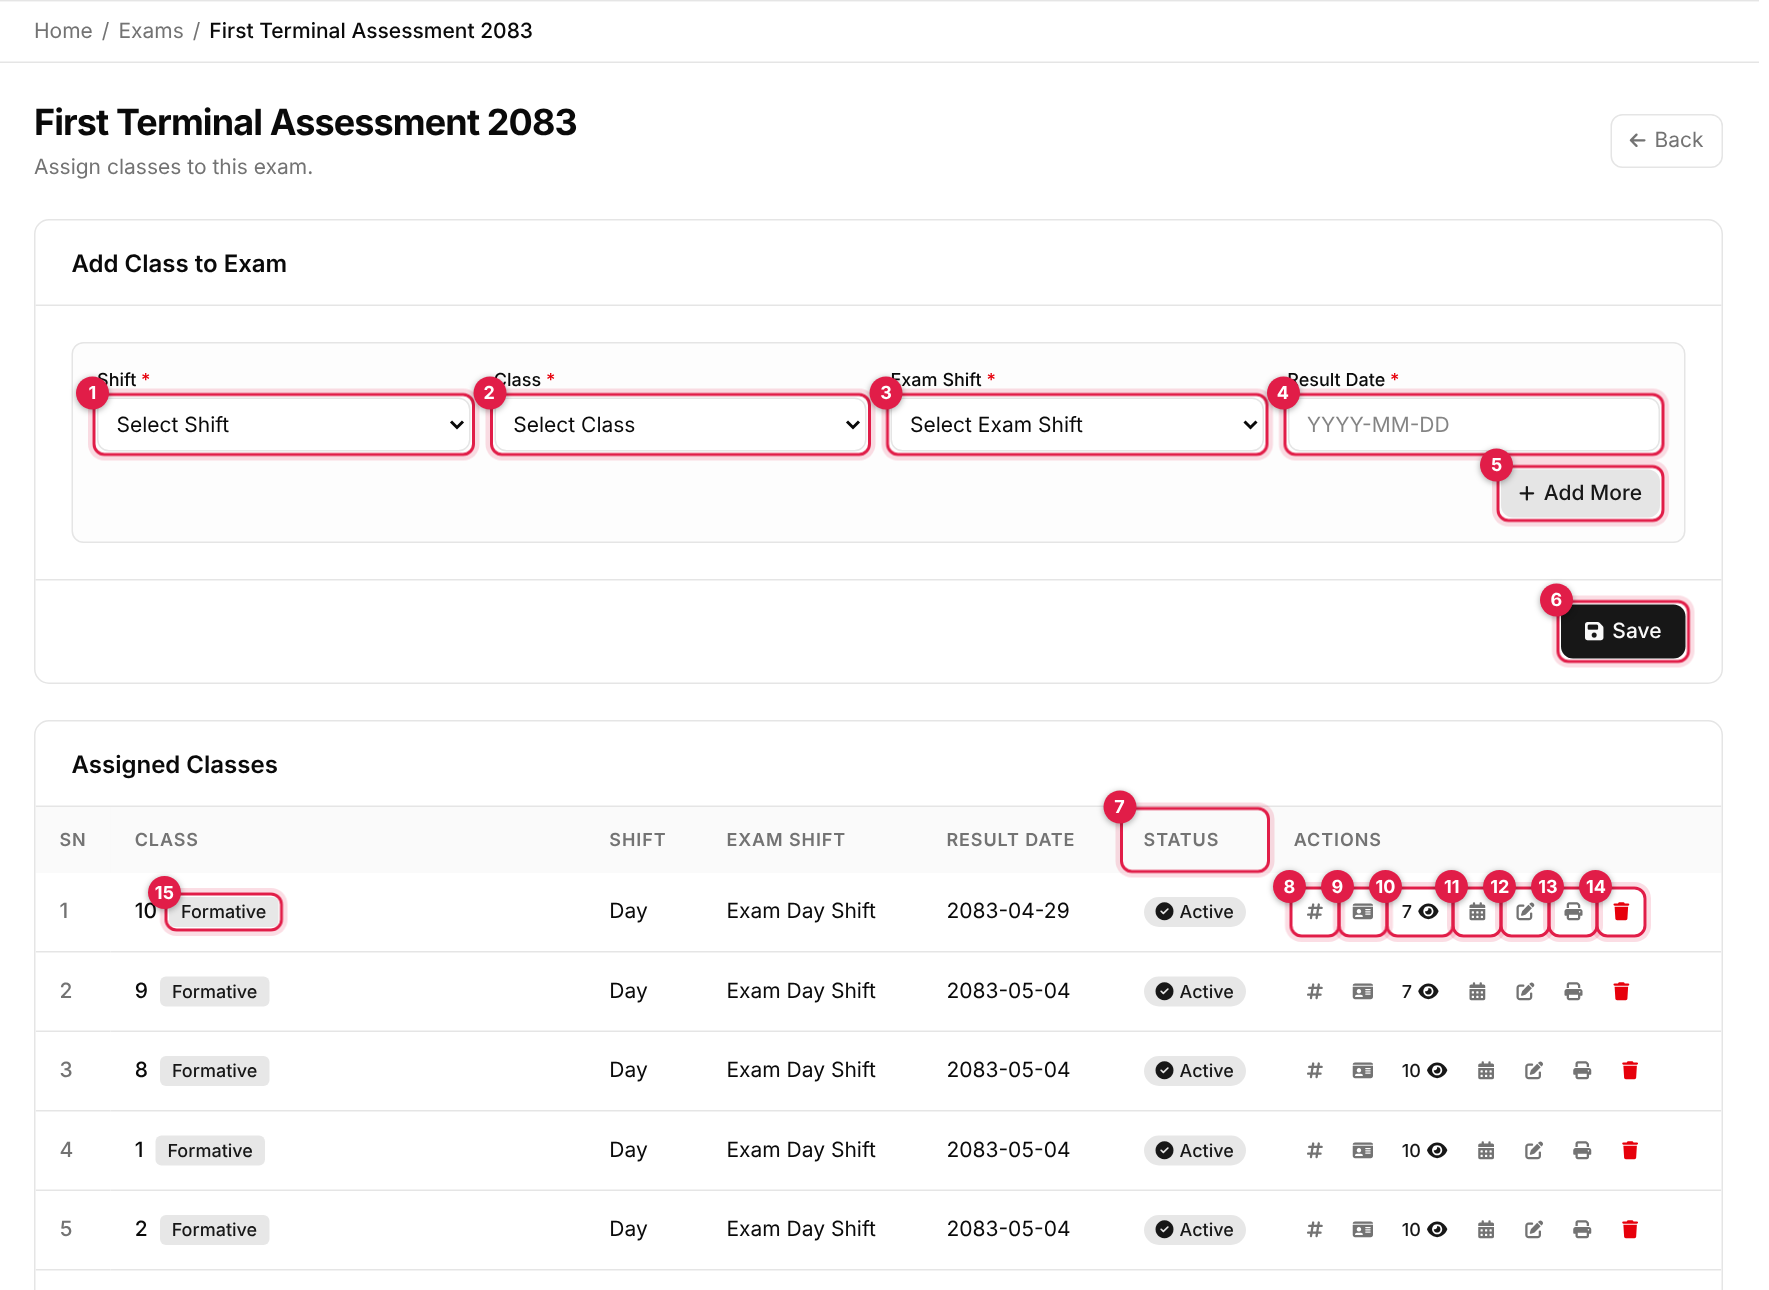
- 1Shift: the class shift (normal shifts only).
- 2Class: fills in after you pick a shift.
- 3Exam Shift: the exam-type shift the class sits in.
- 4Result Date: when results are published,
YYYY-MM-DD. - 5Add More: add another row (up to 15 at a time).
- 6Save the new rows.
- 7Status: click Active or Off to switch the class on or off for this exam.
- 8Symbol Numbers (#): assign symbol numbers.
- 9Print Admit Card: opens the admit cards in a new tab.
- 10Mark Entry (N): set full and pass marks; N is the number of subjects set up.
- 11Exam Routine (calendar): this class's timetable, in a new tab.
- 12Edit: change the exam shift or result date.
- 13Symbol No Print: printable symbol numbers for this class.
- 14Delete: remove the class from the exam.
- 15Formative chip: set formative marks for the class.
Add classes to the exam
-
1
Fill in a row
Choose the Shift, then the Class, the Exam Shift and the Result Date (callouts 1 to 4). All four are required. -
2
Add more rows (optional)
Click Add More (callout 5) for each extra class. You can add up to 15 rows at once; after that you see Maximum 15 entries allowed. -
3
Save
Click Save (callout 6). A class that is already in this exam is skipped with Data inserted is already present!. A successful save shows Data is inserted Successfully!!.
A class can be in an exam only once
Switch a class on or off
Click the status badge (callout 7). It toggles straight away, with no confirmation, and the row is dimmed while Off. You see This is Active! or This is inactive!.
Edit a class's exam shift or result date
-
1
Open it
Click the pencil on the row (callout 12). -
2
Change and update
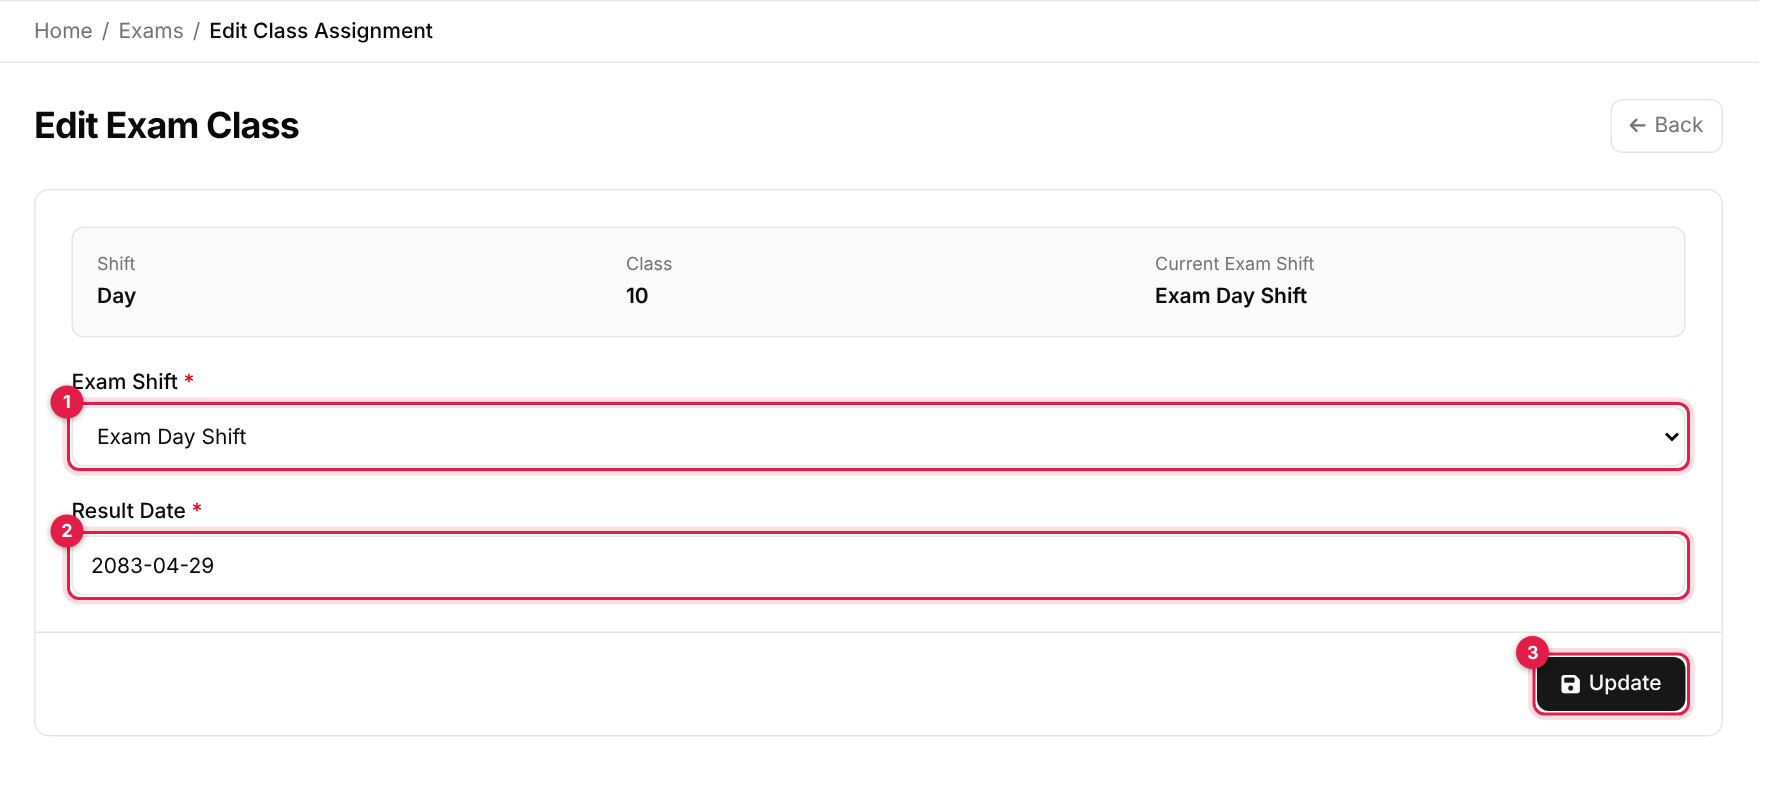
Edit Exam Class # Field Required What to enter 1 Exam Shift Yes The exam-type shift for this class. 2 Result Date Yes The result publishing date, YYYY-MM-DD. The shift and class themselves are shown but cannot be changed.Click Update (callout 3). You see Data updated successfully!.
Remove a class from the exam
Click the red bin (callout 14) and confirm. The class's marks setup for this exam is removed too. The system does not check whether students already have marks, so do not remove a class that has results; switch it Off instead.
Things to know
The table
| Message | What it means |
|---|---|
| Data is inserted Successfully!! | The classes were added. |
| Data inserted is already present! | That class is already in this exam. |
| This is Active! / This is inactive! | The status was switched. |
| Data updated successfully! | The exam shift or result date was saved. |
| Maximum 15 entries allowed. | You tried to add a sixteenth row. Save first, then add more. |